The modules for managing Users, Groups, Claims, Claim Transformations and Connections all use list pages to show the records that exist.
To illustrate how lists work, we will use the Users list as an example.

As you can see, it is not only users that are displayed in the list. There are also two organizations shown, namely Denmark and France. Further you will notice that the item just before Users list in the breadcrumb menu is called Organization: Root. This shows us that the current view is displaying users and organizations related to our Root Organization. If we want to see the users related to Denmark, for example, we will need to click on this organization on the list, with the effect that our view will now look as below.

The breadcrumb menu and title is now indicating that we have moved to the organization called Denmark under the Root Organization —in Denmark there exists three users. There are also two children organizations of Denmark that we can navigate to, if we want to see users further down in the organizational hierarchy. This can be done by clicking on the organization or using “Drill down” from the right click menu.

What we have seen above is that the organizational hierarchy is part of the navigational structure of a list. It helps filter our lists to only show those users that are members of the chosen organization. Many lists will have options of additional filtering using the “View” dropdown to the far right of the action panel (the panel just above the list). By default most lists will just show all records.
It is also possible to search in the lists using the “Filter” field. Insert part of the name of the record you are searching for and only records that have the inserted string in their name will be returned.
When we create new records—for example, a new user in the example above—that user will be related to the organization that we are currently viewing.To create a new user, we simply just click the “New” button on the far left of the action panel.
If we want to take actions for a record in a list, we will need to use the in-line menu.
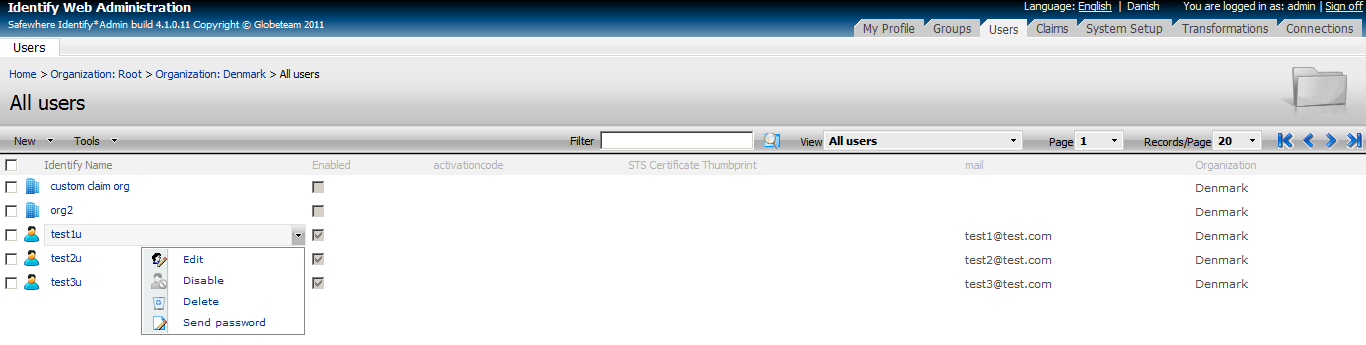
The in-line menu is activated through clicking on the record for which we wish to take an action. In the above example, we have clicked on the account name of the user called Hans Jacob Petersen. We are now presented to the actions that we can take on this user. E.g. clicking the “Edit” option will bring us to the “User form” with the information of test1u. Next chapter will introduce how forms work in Safewhere*Identify.
Final thing to understand about lists is that records are organized in pages. You can use the Page dropdown or the pager buttons (the blue arrows to the right of the Records/Page dropdown) to go to another page. The Records/Page dropdown lets you choose how many records to show per page.